Traditional red beans and rice usually has a ham hock cooked within for a bit......and then of course, some sort of sausage. This recipe has neither.......I still managed a bit of the smoky flavor by using liquid smoke, but really, there's no substitute for the flavor the ham hock imparts. In my opinion, it's a tad spicy, but my husband doesn't think so. And again - the resident carnivore pronounced this dish "pretty good", so I take that as a raging endorsement.
This makes a pretty big batch......enough for 10 to 12 people easily. My husband and I will be eating this for dinner for the next week.
Here goes:
1 lb of pinto beans (or use whatever red-ish beans you prefer)
2 teaspoons liquid smoke
1 teaspoon worcestershire sauce
1 teaspoon salt
A few shakes of red pepper flakes
1 teaspoon thyme (I used dried)
1 teaspoon black pepper
1/8 teaspoon cayenne pepper
2 Tablespoons of chopped chipotles in adobo sauce (this adds smoky flavor - try not to skip using it)
1 to 2 Tablespoons of fresh sage - minced (I use 2 Tablespoons)
1 green bell pepper (I blackened mine)
1 cup of finely chopped onion
2 cloves of garlic, minced
I use my large crock pot and let the recipe cook for 4 to 5 hours, or until the beans are very soft.
You could cut down on the time by using canned beans instead of dried, but I think the long, slow simmer helps the flavors meld together.
Here are the steps in the order I did them. You could prep some of it ahead if need be:
1). Pick through the beans to remove and small pebbles that may have made their way in the bag. Wash them thoroughly and dump in the crock pot. Add water until the water is about an inch above the beans.
2). Add to the crock pot: the liquid smoke, worcestershire sauce, salt, red pepper flakes, thyme, black pepper, cayenne, chipotles, and sage. Turn it on high.
3). Rub some olive oil on the bell pepper, and blacken it in a pan. Just lay it on it's side, whole and with the stem intact. Check it every few minutes; when it's black on that side, turn it to another side.
4). While the bell pepper was cooking, I chopped my onion and garlic. Leave them seperate - don't combine the onion and garlic.
5). In other pan, heat up a bit of olive oil and saute the onions for a couple of minutes. Add the garlic, stir it around another minute or so. Dump the onion and garlic in the crock pot.
6). By now, the bell pepper should be ready. Let it cool, then chop it into very small pieces. Add it to the crock pot.
7). All you need to do is stir it every so often, and make sure the water level stays above the beans. You will need to add more water throughout the cooking process. I also added more salt and pepper after about 3 hours.
8). I leave my crock pot on high for about 3 hours, then turn it to low for another couple of hours. Cooking time will vary depending on your pot. Test the softness of the beans by taste.
9). When you think the beans are soft enough, mash up about half of them - or more than half, depending on the consistency you want your red beans and rice to have. I just mash them right in the crock pot.
10). Spoon over rice and enjoy!
Wednesday, December 29, 2010
Tuesday, December 28, 2010
Creamy Spinach-Mushroom Taquitos

Awhile back Laura posted her awesome spinach enchilada recipe. I made them, (loved them btw) but there are only two of us so I had a container of the filling leftover and I froze it. It freezes very well, and today I pulled it out and made some awesome taquitos with it.
These taquitos are vegan, but anyone who doesn't hate spinach will love them.
They would be awesome at any party or as a main dish, and if you have vegetarian friends you want to feed occasionally these are pretty much a guaranteed hit. The traditional accompaniment for taquitos is sour cream and guacamole. These don't really need sour cream as one of the fillings is a tofutti based cream cheese type thing. Guacamole would be awesome but honestly, just a simple hot sauce would do just fine. They are very flavorful and don't need much help.
The recipe calls for only 1 to 1+1/2 cups of enchilada filling. You can freeze any that is leftover, or make enchiladas the next night. Or if your making a lot of these for a party you can use the whole recipe.
Ingredients:
1-11/2 cups Lauras spinach enchilada filling
1 small tub of tofutti cream cheese (vegan) room temperature
1 t. chili powder
1/2 t. garlic salt
4T of chopped green chili
1/2 t. dehydrated onions
1 t dried parsley
1 doz corn tortillas
1/2 cup vegetable oil
Mix all ingredients except tortillas , oil, and enchilada filling.
soften the corn tortillas in the microwave by stacking them on a plate and smearing a little olive oil on each one. Cook in the microwave for about 1 minute just to soften.
take a tortilla, put a spoonful of tofutti mixture in the middle and kind of smear it over half of the tortillas, and then a very large spoonful of spinach mixture down the middle of the tofutti.
Roll up beginning on the tofutti side. Place seam down into large frying pan with heated oil. Let brown and turn and brown the other side. Drain on paper towels. Repeat till you have done as many as you want. You can generally cook 3 at a time.
Serve immediately or place into pan to stay warm in the oven. These are great with traditional beans and rice as a meal, or with guacamole as party fare.
Thursday, December 23, 2010
Pizza! Pizza! Pizza!

Well I've been making my own pizza crust for quite awhile now, and wanted to post it because it's so easy. But the problem was that I don't use a recipe, when I bake it reminds me of the Donald Duck cartoon where he goes into the kitchen to bake Daisy a cake and there's this huge cloud of flour and chaos and out of it all a fabulous, if somewhat lopsided cake emerges.
Pizza is really great because you are not bound by any rules, use whatever you have. Your favorite spaghetti sauce works great, you can get creative with cheeses, and toppings are only limited by your imagination. I personally like more veggies than cheese, I use about a cup of cheese on an entire pizza, but don't forget the grated parmesan too, it makes all the difference. A teaspoon of dried basil sprinkled on top is awesome.
When I bake bready type things I don't measure, so I've done it a few times trying to get the exact amounts. Difficult, but I think I've finally got it.
Home made pizza crust:
1+1/2 cups warm water
1 TBS honey (I really just give a big squirt from the bottle)
1 tsp. salt
1 package quick rise yeast
1/4 cup olive oil
3-4 Cups unbleached white flour.
In a large bowl mix the water, honey and yeast. Stir and then let sit till yeast is fully dissolved and beginning to bubble a little.
add the salt and olive oil, mix and then start adding the flour. Add two cups and mix well, then add 1/2 cup at a time till the dough is stiff enough to start kneading. Turn it out onto a well floured surface and begin kneading adding flour to the top and bottom whenever it starts getting sticky. knead in this manner until you have a smooth ball of dough that springs back when you touch it. At that point it is ready to rise.
in a clean large bowl put a tablespoon or so of olive oil. Take your ball of dough and oil it well all over in the bowl and then cover with a clean dishtowel and leave in a warm place to rise. It will take at least an hour, maybe more depending on the warmth of the room. When the dough is double in bulk poke it with two fingers to release the air and you should have a soft elastic dough.
Divide dough in half, this recipe makes enough for two cookie sheet size pizzas. Or you can make a loaf of bread with the second half.
Put the dough you are working with on a floured surface and knead just a little to toughen it up. When it is smooth and soft again begin rolling it out to fit the pan you are using. Perfection is not necessary, the charm of this pizza is that its home made. When you think it's about right sprinkle your sheet with a little cornmeal to keep it from sticking and place the dough on it.
If you like a thick puffy crust, let it sit and rise. When double add your sauce, cheeses and toppings and bake on center shelf of oven at 375 for 15-17 minutes.
If you like a thin crust add your sauce, cheeses and toppings and put it right into your preheated oven on the center shelf for 15-17 minutes.
Crust should be golden brown on the sides, the cheese should be bubbly.
Thursday, December 16, 2010
Jim's Naanich
Next up we have a quick and easy sandwich recipe from Jim. He adapted this recipe from a vegetarian sandwich found in the book "By Any Greens Necessary". He sent the recipe from the book also; I'll post that later. I am posting this one first because it seems easier to make, and more likely that folks would have most -if not all- of the ingredients on hand.
Here goes:
You will need:
1/2 piece of naan bread
Avacado (as much as you like - mash it up, or slice it)
Roma tomato - again, as much as you like
Kale - a few small pieces
Bragg's amino acids (tastes like soy sauce)
Bragg's nutritional yeast
Cucumbers and garlic - optional
Tempeh (called for in the original recipe from "By Any Greens Necessary". Optional)
I cut a piece of naan bread in half. Then cut one half into quarters. Then warm the naan bread. I get the Indian naan bread from Sprouts. Spread avacado on the naan quarters. Add thin slices of roma tomato. Add small pieces of kale. A few sprinkles of Bragg's amino acids and Bragg's nutritional yeast. I found both of these at the vitamin shoppe. The naan bread warmed up with avacado is sooo good. Sometimes I add thin sliced cucumbers and finely chopped garlic. You could add thin slices of basically anything you like. I'm thinking about adding thin sliced or shaved carrots on a future naanich. I am definitely going to be adding the tempeh since I love bacon but am trying to cut way down on animal fat replacing them with raw vegetable fats. I saw some tempeh in the refrigerated section at Sprouts today.
I love this naanich as a snack or a quick lunch since it goes together quickly, is yummy and nutritious.
Tuesday, December 14, 2010
King Ranch Chicken Casserole ala Brandon!
Our friend Brandon sent us this wonderful recipe for King Ranch Chicken Casserole. Get your elastic pants on!!
2 8oz pkgs of Mexican-style marinated baked tofu cubes (see link in comments about how to prep your tofu for this recipe. Prep your tofu.....you know you want to).
1 cup finely chopped onion
1 cup finely chopped green pepper
1 clove of chopped garlic
1/2 tsp of chili powder divided
1/4 tsp of ground cumin
1 cup of vegetable stock
2 1/2 tbs of flour
1/4 cup of tofu sour cream (or reduced fat sour cream for non vegans)
salt and pepper to taste
8 corn tortillas ( i usually use the whole package of 12 but whatever floats your boat)
14.5 oz can of diced rotel tomatoes with green chilis drained
1 1/2-2 cups of soy cheese, tofu cheese, or almond cheese ( again whatever floats your boat but i use soy cheese)
paprika
pre heat oven to 350. lightly oil a 2 qt casserole dish. in a large bowl combine onion, green pepper, tofu, garlic and half of the chili powder and set aside.
put stock in a small sauce pan and combine flour and cook over medium heat. whisk until sauce thickens. remove from heat and whisk in sour cream, the rest of the chili powder and salt and pepper to taste.
in a casserole dish layer half the tortillas ( i like to cut them in to inch thick strips) half the tofu mixture, half the can of rotel, half the sour cream mixture, and half the cheese. then layer again with the rest of the tortillas and so on making a second layer ending with the cheese on top. sprinkle with a little paprika and garlic powder. place inthe over and bake until cheese is bubbly and a little brown around the edges (about 30-35 mins) remove from the oven and let cool for about 5 mins.
Monday, December 6, 2010
Playin' with Pepperoni

So, I was at the store the other day and saw a vegetarian version of pepperoni. Now, the fact that pepperoni is meat is not the only reason I won't eat it anymore. Every brand I have seen is chuck full of preservatives and other assorted poisons. So I checked out the ingredients of this soy based pepperoni and decided to give it a try. I also spotted another new product, Fleischman's yeast made especially for pizza crust. I make homeade pizza about every two weeks or so, so I decided to try that too.
The yeast was very easy to use, and quite miraculously you don't have to let the dough rise. (How did they do that?) One package makes exactly the right amount for one large pizza when following the instructions on the package. It was a very fast mix, a quick knead to get it the right smooth and slightly spongy texture, and then it said to roll it out. I did, and the next instruction was to put your sauce and toppings and slide into the oven. I did this and it came out looking great.
So, was it as good as it looked? No. The crust did not rise at all, although if you like a very thin crust it might be passable. The pepperoni not too surprisingly I guess, did not taste like pepperoni. I ended up feeding the pepperoni off my pizza to the dogs who thought it was great. I will stick with vegetable toppings next time and my own crust recipe which I will post in a few days. I do make a delicious pizza, but it wasn't this one.
Sunday, November 28, 2010
"Beef" Enchiladas
Here's a recipe utilizing Meatless Veggie Crumbles. These turned out rather well; my husband went back for seconds. I used Toffuti cream cheese instead of any of the vegan shredded varieties, because I hoped it would melt better. It didn't. But these were still very tasty.
You'll need:
1/2 of a small white onion - chopped
1 green bell pepper - chopped (I charred mine in a grill pan first, but that isn't a necessary step)
1 clove garlic - minced
1 tspn oregano (optional)
1 Tablespoon olive oil
1 12 oz package of Boca Meatless Veggie Crumbles (or whatever brand is available)
1 package of Taco Seasoning mix
1/2 cup water
1 small (4.5 oz) can of chopped green chilis
1 large can of red enchilada sauce (1 lb 3oz)
Toffuti cream cheese
Corn tortillas (12 to 16)
Put olive oil in a fry pan; add the onion and bell. Sprinkle salt and pepper on it. When the onion starts to brown around the edges, add the garlic. Stir around a few times, now add the veggie crumbles, the taco seasoning mix, the oregano (if you are using it), 1/2 cup of water and the green chilis. Stir around a bit and take the pan off of the heat.
Here's what my finished filling looked like:
 In a 13 x 9 pan, spread a little of the enchilada sauce (so your enchiladas don't stick). I used the sauce right out of the can - I didn't heat it up.
Make your tortillas pliable by heating them up in the microwave - smear some olive oil on both sides of a tortilla, stack up 4 or 5 on a plate and microwave for 30 seconds.
On a small salad plate, put a spoonful of the sauce, place the warmed tortilla on it, add more sauce (about a spoonful) to the tortilla, then put your cream cheese on it. I made a row of the cheese about 1/4 to 1/2 inch wide down the middle of the tortilla. Add your "meat" mixture down the middle, and roll it up. Place enchilada seam side down in the pan.
Continue until you've used up all the meat mixture, or if you only want one pan of enchiladas, you could save the remaining mixture to top off nachos later in the week.
Cover the enchiladas with the remaining sauce and then cover the pan VERY TIGHTLY with foil. Pinch the foil all around so no steam escapes.
Bake at 350 for 30 minutes.
You'll need:
1/2 of a small white onion - chopped
1 green bell pepper - chopped (I charred mine in a grill pan first, but that isn't a necessary step)
1 clove garlic - minced
1 tspn oregano (optional)
1 Tablespoon olive oil
1 12 oz package of Boca Meatless Veggie Crumbles (or whatever brand is available)
1 package of Taco Seasoning mix
1/2 cup water
1 small (4.5 oz) can of chopped green chilis
1 large can of red enchilada sauce (1 lb 3oz)
Toffuti cream cheese
Corn tortillas (12 to 16)
Put olive oil in a fry pan; add the onion and bell. Sprinkle salt and pepper on it. When the onion starts to brown around the edges, add the garlic. Stir around a few times, now add the veggie crumbles, the taco seasoning mix, the oregano (if you are using it), 1/2 cup of water and the green chilis. Stir around a bit and take the pan off of the heat.
Here's what my finished filling looked like:
Make your tortillas pliable by heating them up in the microwave - smear some olive oil on both sides of a tortilla, stack up 4 or 5 on a plate and microwave for 30 seconds.
On a small salad plate, put a spoonful of the sauce, place the warmed tortilla on it, add more sauce (about a spoonful) to the tortilla, then put your cream cheese on it. I made a row of the cheese about 1/4 to 1/2 inch wide down the middle of the tortilla. Add your "meat" mixture down the middle, and roll it up. Place enchilada seam side down in the pan.
Continue until you've used up all the meat mixture, or if you only want one pan of enchiladas, you could save the remaining mixture to top off nachos later in the week.
Cover the enchiladas with the remaining sauce and then cover the pan VERY TIGHTLY with foil. Pinch the foil all around so no steam escapes.
Bake at 350 for 30 minutes.
Sunday, November 14, 2010
Autumn Apple Cake

Well first of all, let me just say I make no apologies for my love of cake. It's my favorite dessert, I can pass up pie or cookies or other sugary things all day long. But set a piece of cake down in front of me and I am all over it, unless it's covered in some gluey substance made of shortening and sugar. I dislike most kinds of frostings, and if I use one I will usually melt it down to a glaze or sauce and use much less of it. So I'm always on the lookout for cakes that don't require a typical frosting.
It's autumn and I had a surplus of apples, so I went hunting for an apple cake recipe. This one caught my eye because I'm also a huge fan of cinnamon, and because it uses only 1/2 cup of oil. I won't make a cake that uses more than that. Honestly, this cake is so moist you might be able to get away with 1/3 cup.
I would like to credit the original poster of the recipe but unfortunately I can't. It was just a random recipe I found which was not credited to anyone or even a certain recipe site. But it's fabulous and I wanted to share it.
Autumn Apple Cake
3/4 cup light brown sugar firmly packed
1/2 vegetable oil
2 teaspoons cinnamon
1 tablespoon vanilla
2 large eggs
1/4 cup milk
1 3/4 cup all purpose flour
1 tablespoon baking powder
1/2 teaspoon salt
2 medium apples cored and finely chopped
caramel topping
In a mixing bowl with electric mixer, beat together sugar, oil, cinnamon, and vanilla. Add eggs one at a time beating well after each addition. Mix in the milk, flour, baking powder and salt, blending well. Stir in apples, reserving 1/4 cup of them for the topping. This makes a very thick batter which looks more like a quick bread. Spray a 8 inch square pan with cooking spray and spread in the batter. bake at 350 35-45 minutes. Check for doneness by inserting a knife into the center, if it comes out clean the cake is done. (Don't be afraid to bake longer if needed, this cake is so dense it may need more baking time).
Caramel topping
1/2 cup light brown sugar packed
1/4 cup butter
1/4 cup heavy cream
1 teaspoon vanilla
1/4 cup finely chopped reserved apples
put all ingredients except vanilla into small sauce pan and heat until a low simmer is reached. Continue cooking for about 5 minutes on a very low simmer, stirring often. Remove from heat and add the vanilla stirring in quickly. Spoon the apples over the cake and drizzle with about half the sauce. (You could poke some holes with a fork into the cake if you wanted). For best results serve warm with a spoonful of the still warm sauce.
This cake is awesome with some cinnamon coffee. It was a big hit at my house, even with the chocolate fanatic I live with.
(How do you like my beat up old tin pan)
Sunday, November 7, 2010
Creamy Spinach Enchiladas
First up, in my development of "Tofutti Mad Skillz" are Spinach Enchiladas. I think they turned out very yummy; the Tofutti acted just like sour cream throughout the mixing and cooking process. I have to say I was surprised. These are a bit of work, but well worth it if you are craving Tex-Mex. I would even serve these to company.
For the Spinach Stuffing: (sauce ingredient list below)
2 Tbls. Olive Oil1/2 cup onion - finely chopped
1 tsp. dried oregano
1 tsp. salt
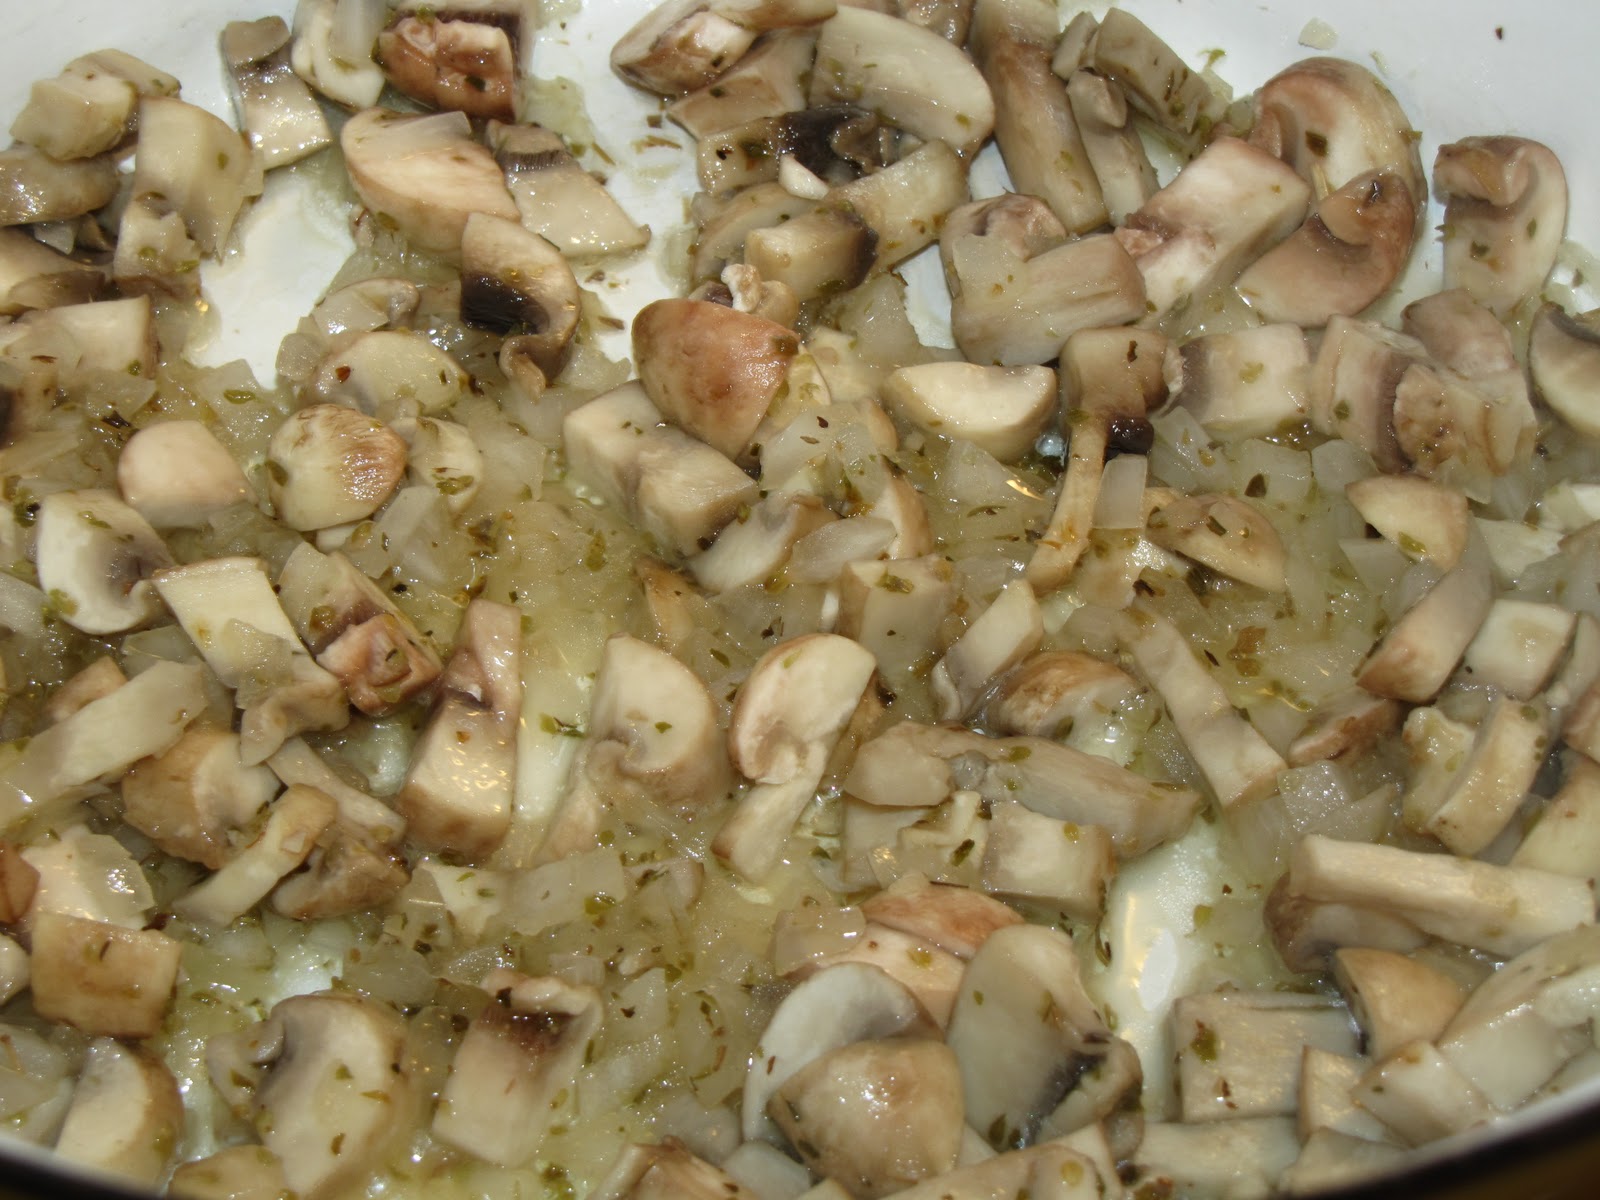
2 cups fresh mushrooms - small chop
16 oz of spinach (vat o'spinach, seriously)
2 garlic cloves - minced
2 Tbls. fresh cilantro - rather finely chopped
Here's what that cast of characters looks like:

Here are the steps:
1). In a large pot (perhaps a soup pot) heat up oil till shimmering
2). Add onions, salt and oregano
3).Cover and let sizzle for a few minutes.
4). Add mushrooms
Here's what it will look like:
5). Cover and let simmer for about 5 minutes.
6). Add the spinach - I put in about 7 handfuls to start.
7). Cover and let wilt.
8). Add a few handfuls every 2 to 3 minutes and let it wilt down. Continue until you've added all the spinach (yes, yes....it will all fit. And you'll be amazed at how tiny all that spinach became).
Here's a final pic of the filling mixture: (well, not quite....I let it wilt a bit more after this)

9). Throw in the garlic and the cilantro. Give it a good stir, take pot off the heat and set aside.
Now for the sauce - you will need:
1/4 cup olive oil
1/4 cup flour
2 cups of Green Enchilada sauce (I used Old El Paso Mild Green Chili sauce)
*if you can't find the Green Chili Sauce, just buy plain Green Enchilada sauce and a 4 ounce can of chopped green chilis. In a 2 cup measuring cup, pour the green chilis first, then make up the difference with your canned enchilada sauce).
1 12 ounce tub of Toffuti
Here's the steps:
1). Heat the olive oil till shimmering, add the flour and whip with a wisk until all the lumps are gone. I take it off the heat if it's bubbling too much.
2). Add the 2 cups of Enchilada Sauce and the Tofutti.
3). Whip It!! Whip It Good!!
Here's a pic:

Once it is a smooth consistency, take it off the heat and set aside.
Time to assemble your enchiladas! You will need 12 corn tortillas and a 13 x 9 pan.
Here's the steps:
1). You need to heat up the tortillas so they are pliable. You can microwave them, but I didn't have much luck with that. They cracked when rolled up. So I did mine the old fashioned way - dipped them in hot oil for a few minutes. Just heat the oil in a small pan, with tongs dip them in for about 10 seconds on each side, stack them up on a plate.
2) If you have any leftover enchilada sauce in the can, pour it into the bottom of your 13 x 9 pan so the enchiladas don't stick.
3). Lay your tortillas on your "work" plate, and put a heaping forkful of your spinach filling in it, roll it up and place in the pan.
I just can't stop with the pics:


4). Once you have them all assembled and in the pan (I got 13 total), then cover them with the cream sauce mixture.
5). Bake at 375 for 20 minutes.
Delicious, bubbling goodness:

If you want to reduce the oil, you could make an enchilada casserole, just layer the tortillas, filling, sauce......do this 2 times and end up with sauce on top.
Saturday, November 6, 2010
Spackle
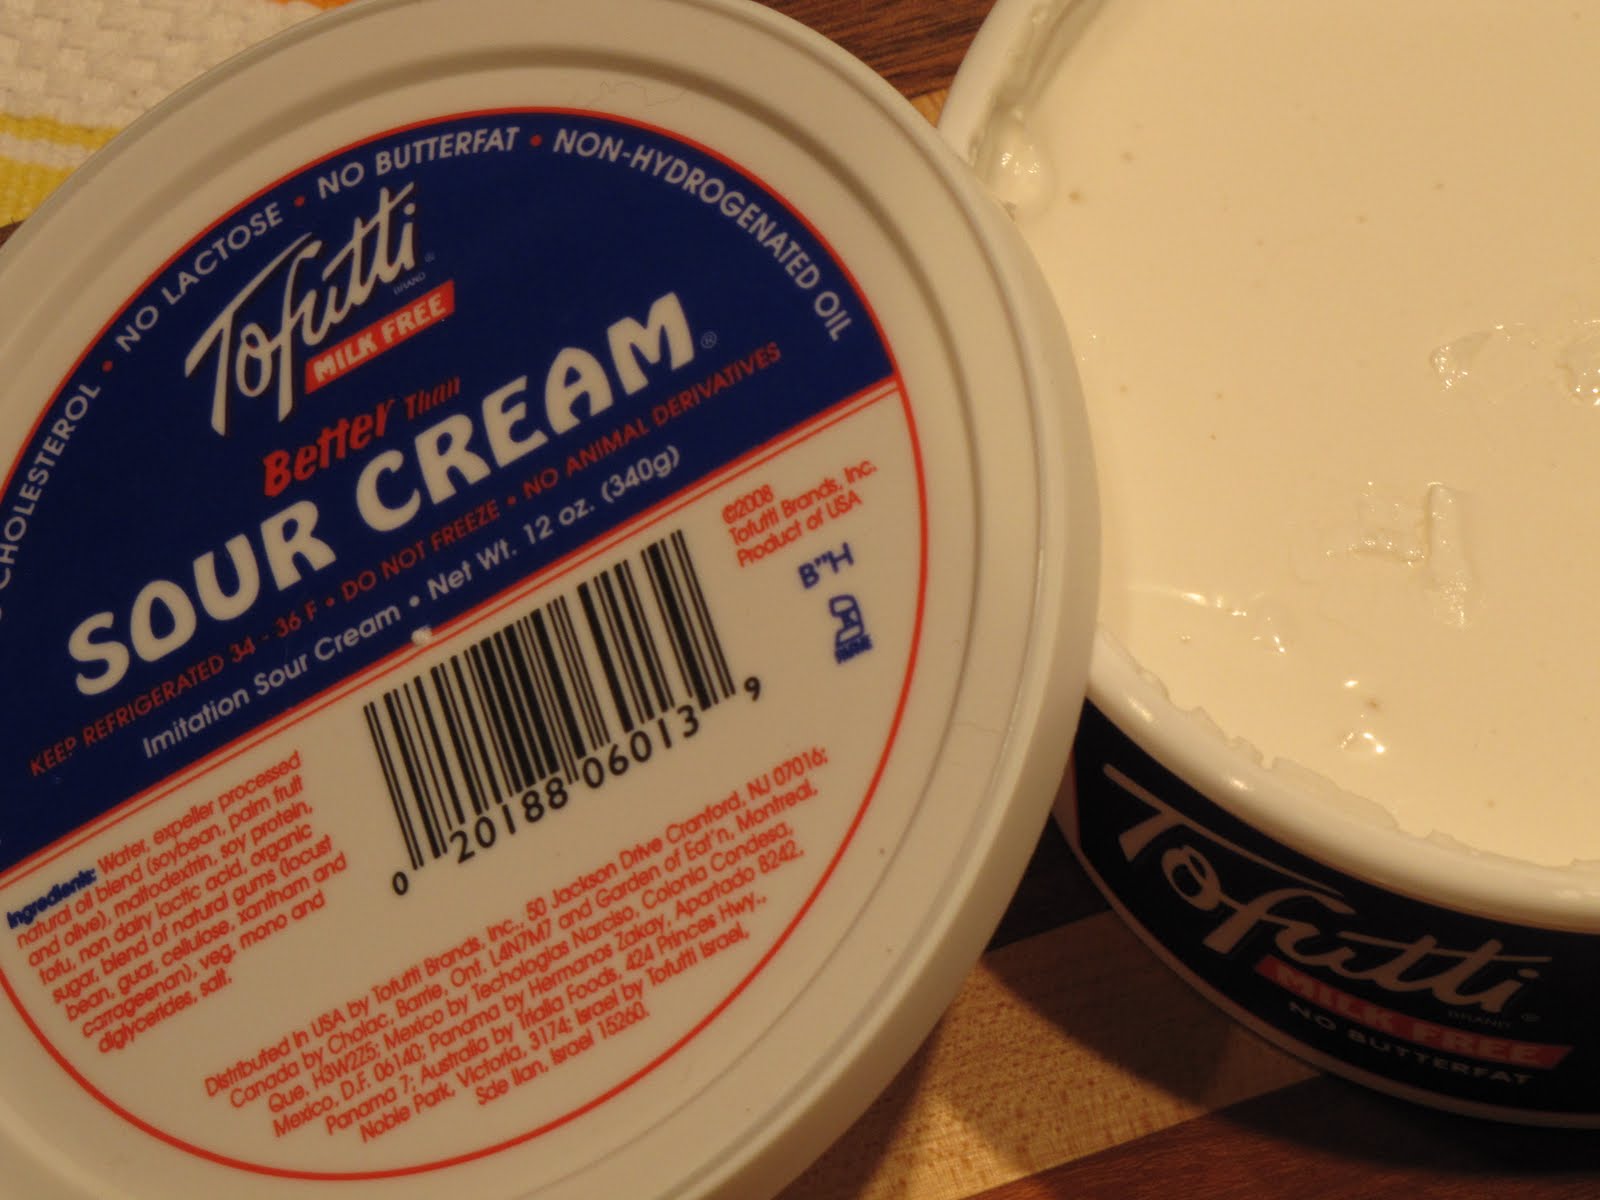
That was my first thought after peeling back the clear plastic overlay. But it's not spackle, it's vegan sour cream. Hmmm...........riiiiiight.
I stuck a spoon in it........kinda bland......really, not much taste at all.
My feeling is that Tofutti can be used as sour cream is many times - as the base of a creamy sauce.
The challenge at hand is to create some delicious dishes which incorporate Tofutti.
I'll let y'all know how that turns out.
Saturday, October 30, 2010
Ironman Soup
I grew up in the desert southwest where the food has a lot of Mexican influence. I remember my father buying huge burlap bags of green chilies and roasting them outside over mesquite. Us kids would peel them and bag them for the freezer and we would have delicious green chilies all winter.
My hispanic friends seemed to all have large extended families and as I grew old enough to notice such things I realized that they all drank, smoked, and ate constantly yet the granparents were all spry. Rare was a heart attack, and cancer was unheard of.
More recent nutritional information suggests that the large amounts of onion, garlic and green chilies in their diets (and mine) probably have a lot to do with that. So I use a lot of these ingredients, and much of my food has Mexican influence.
So this soup is not for the faint of heart, but it is good for your heart. And, if you don't mind a bit of heat, it is delicious. (If you do, use canned green chilies instead.) I call it Ironman Soup because its all you need to ward off a cold.
Ironman Soup
1TBSP olive oil
1 small to medium onion diced
5 mushrooms sliced
2 roasted green chilies, peeled and seeded and chopped.(or a can of them if fresh are unavailable. )
4 roasted garlic cloves chopped
1/4 cup of dry navy beans
2 diced carrots
2 diced potatoes
1/2 cup frozen corn
1 32 oz box vegetable broth
1 small can of hominy with juice
pinch of parsley, italian seasoning, thyme, and a bay leaf.
In a large saucepan saute' the onions and mushrooms in the olive oil until the onions are soft and translucent. Don't let them caramelize. Add the broth, and all the rest of the ingredients. Make sure the broth covers all the ingredients, if not add some water. Bring to a boil and then reduce heat to low or medium low to simmer. Cook 3-4 hours checking periodically to make sure there is enough liquid. Add water if needed. Soup is done when navy beans are soft. Remove the bay leaf and salt and pepper to taste.
This soup is very flavorful and has a lot of texture. It goes great with most breads, but my favorite is cornbread.
A staple of my cooking: Roasted Garlic
Since learning how to roast my own garlic I have become something of a fanatic. It tastes so much better. Milder and more flavorful at the same time. So I rarely use regular chopped garlic anymore, I almost always use roasted. It's very simple to do, and you can do a lot at once and keep it in the pantry.
Roasted Garlic
One large head of good quality white garlic.
Olive oil.
Preheat oven to 350 degrees.
Break the head of garlic to separate all of the cloves. Slice the bottom off of each clove and then peel, and put into a small bowl. Once you have them all done, get a square of aluminum foil. Place all of the garlic in the center and drizzle with olive oil. Wrap it envelope style and place into a pan and into the oven. Roast for about 30 minutes.
Take it out to check for doneness, it should be translucent, just barely getting brown. If there is no brownness yet put back in for 10 more minutes.
When its done, cool for 15 minutes and then place into a small jar and cover with more olive oil. Put on a tight lid. This stores well in the pantry in cool weather, in warm weather I refridgerate it.
Wednesday, October 27, 2010
Vague Vegetarianism
Full Disclosure: I am not now, nor have I ever been, a strict vegetarian.
Are you still here? Did I lose anyone?
Ahem........
But I'm easing into it slowly. It really does seem the healthiest way to eat......after all, has a doctor ever cautioned you or anyone you know to "cut back on your vegetables"? Probably not. But we've all heard folks being told to cut back on red meat, sugar, and carbs.
I hope you don't find my Vague Vegetarianism off-putting.
I hope you will join Wren and I on our journey to healthier eating, and livelier living.
And please feel free to offer up any tips or tricks you have.
Dado's Eggplant Casserole
This recipe is from Fresh from the Garden - Time honored recipes from the Readers of Texas Gardener. It was contributed by Cathy Campbell of Nacogdoches. The recipe is given as in the cookbook, my comments are in parentheses.
1/4 cup oil
1 eggplant
Small amount of flour
1/2 cup chopped onion
1 clove garlic, minced
1/2 pound ground beef (I use a pak of frozen veggie crumbles - I think it's 12 oz)
3 large tomatoes, sliced, or 1 can of tomatoes (I use canned, diced tomatoes)
1/4 teaspoon summer savory
1/4 teaspoon oregano
3/4 cup grated cheddar cheese (or equivalent soy cheese)
1/3 cup bread crumbs
Slice eggplant and rub with flour (I slice mine about 1/4 to 1/3 inch thick). In skillet, heat oil. Brown eggplant slices slightly on one side. Turn and salt. (I find I have to add more oil at this point; the eggplant really soaks it up). Cook covered for 5 to 10 minutes over slow fire. Remove from skillet. Brown onion, garlic and meat (or veggie crumbles). Add tomatoes, savory and oregano and cook for 10 to 15 minutes (covered - and make it 5 minutes). Place eggplant in casserole and layer meat, bread crumbs and cheese; repeat. Bake at 350 degrees for 30 minutes.
Monday, October 25, 2010
The Great Taco Experiment

I might have become a vegetarian long ago if it weren't for tacos. My favorite food, and occasionally, my reason for living. Not Taco Bell tacos, or Old El Paso tacos, real tacos. Crispy shells I fried myself, perfectly seasoned meat, crisp lettuce, and my own authentic salsa or in a pinch, El Pato. Well, the vegetarian thing happened anyway, so now I must find or create a suitable taco.
I've embarked on a taco filled journey, laden with all kinds of different fillings and seasonings, toppings and sauces. Could life get any better?
My first experiment (which was not all that original) , is black bean tacos. And they are very yummy.
Black Bean Tacos (serves 4)
Filling:
1 can black beans, drained
1 can green chilies chopped
1 clove garlic chopped
Mix and heat ingredients in a small saucepan, set aside.
Taco Shells
8 fresh corn tortillas
1 cup vegetable oil
Heat the oil on medium high until hot in a small saute pan. Using tongs slide the tortilla into the hot oil. Wait for the tortilla to show bubbling and then using the tongs lift one side up, while simultaenously holding the other side down. (I know it sounds tricky but you'll get the hang of it.) When the bottom side is partially cooked enough to hold its shape use the tongs to flip it over to the uncooked side. Keep the tongs in the center to make the taco shell hold its shape. Finish cooking both sides in this manner till light brown and crispy. Do 8 shells in this manner.
Toppings:
One cup finely shredded lettuce
one tomato diced
one cup shredded cheese
Your favorite salsa
chopped green onions
Some cilantro leaves
Tofutti sour cream
Assemble the tacos by filling about half full with the bean mixture, then a spoon of salsa, cheese, lettuce, tomato and onions and finally garnishing with cilantro leaves and sour cream.
This recipe can easily be made vegan by melting a strip of Tofutti mozzerella cheese on top of the beans before adding the rest of the toppings.
Yay! Tacos!
Subscribe to:
Posts (Atom)